
1. Insert the battery and test sensor
Before you can install the sensor, it’s a good idea to power it up and test it. Entry sensors are harder to move after installing them, so this can save a lot of trouble later in the process.
Another reason to insert batteries is that some security systems and smart hubs require pairing before installation, especially if you’re buying add-on sensors.
2. Find a suitable location
Tracking when doors and windows open is a crucial component of security systems—and the foundation of intrusion detection. Let’s explore how entry sensors work so you can understand why placement matters.
Door and window sensors have two components: a reed switch and a magnet. When you put a magnet near a reed switch, the magnet pulls two small metal contacts together to complete an electrical circuit. In contrast, the “reeds” separate if the magnet moves away, triggering an alarm signal.
Entry sensors work best in these locations:
- Doors
- Windows
- Cabinets and safes
Doors and windows
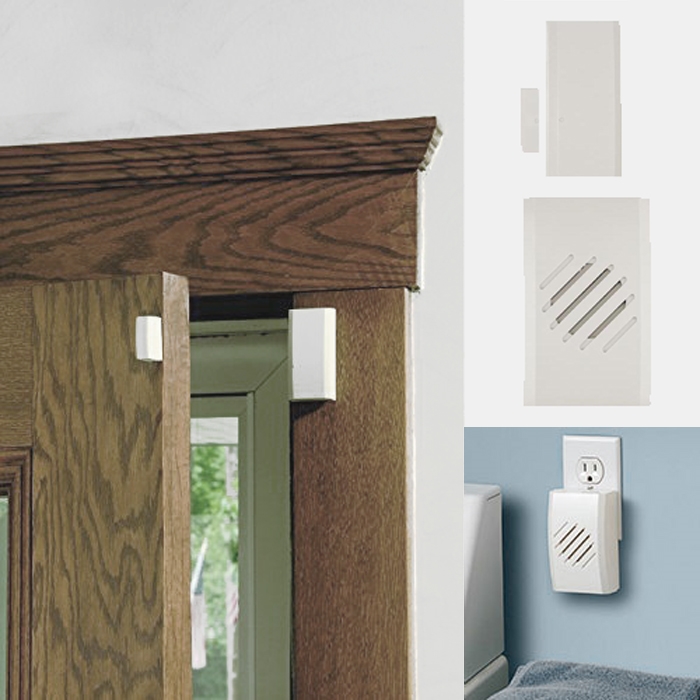
A door and window sensor works best when you mount it on a flat surface with the magnet on an adjacent surface: one half on the door/window and the other half on the door/window’s frame.
It usually doesn’t matter which half goes where—as long as the two halves are near each other (within an inch or two).
Installing sensors on metal
You may need to adjust the installation if you want to install a magnetic sensor on a metal surface since that can interfere with regular operation in some cases.
Metal door, wooden frame: Place the magnet on the door and the door alarm on the frame. You might not need additional mounting hardware if the magnet sticks well enough to the door. But it doesn’t hurt to secure it in place to prevent it from flying off if the door slams.
Metal window/door and frame: Try out your sensor first to see if it works normally. You can temporarily use your hands or a small piece of tape to hold it in place while testing.
If it works as expected, install the sensor as normal. If it doesn’t work, here’s what to do:
- Contact the manufacturer to see if there’s a way to jerry-rig the sensor. Be prepared to hear that there’s nothing you can do. Take some deep breaths and a few spoonfuls of ice cream, and move to step two.
- If jerry-rigging doesn’t work, see if your system supports a plunger sensor, hinge sensor, or vibration sensor.
Cabinets and safes
Another way to use a contact sensor is to place it on a cabinet or safe to track if curious fingers manage to get into something forbidden. This could be anything, like a pantry full of treats, a bathroom medicine cabinet, a closet full of chemicals, or a safe full of valuables.
While this use of entry sensors is better for homes with children, it can work anywhere you want a little extra security.
3. Mount the sensor
After you have a working sensor and a suitable location, it’s time to install everything. Most contact sensors use adhesive tape that makes them easy to install, but some have mounting screws.
Both methods work fine but have different strengths:
- Adhesive tape is easier to attach, but it’s harder to remove, and you can’t reuse it.
- Screws are reusable, but are mainly useful for wood surfaces, involve more tools, and leave holes behind.
Pay close attention to the sensor’s shape and markings so you don’t accidentally put the magnet on the wrong side of the main sensor. This could keep the reed sensor from triggering properly, resulting in a non-functional or unreliable sensor that can trigger a false alarm.
Door and window sensor mounting steps
- Clean the surfaces where you’ll install the sensor’s two halves so the adhesive works better.
- Place the main sensor first, holding for around 30 seconds to ensure a strong adhesive bond.
- Place the magnet on the surface opposite the sensor. If you’re mounting on a door, make sure there’s enough room for the door to move freely without bumping the door sensor.
- Test the sensor by opening and closing the door or window. You can usually see the status via a mobile app, small LED light, or your burglar alarm’s control panel.
Repeat the process for all of the sensors you want to install.
4. Set up arming and disarming rules
After installing your sensor, take a few minutes to familiarize yourself with the alarm system and to assign the sensors to specific roles. In most cases, sensors should trigger an alarm when you arm your system in home or away mode.
You don’t need to set up sensors on cabinets to activate the alarm unless you want to. Instead, you can get a notification on your smartphone, saving you the hassle of contacting the professional monitoring center.